


When I tell writers how much I love using Scrivener to write my novels, I often get some version of “I bought it, but I’ve never used it because it’s so complicated/confusing/frustrating.” If that sounds familiar, this is the post for you.
Scrivener is a word-processing tool designed specifically for writers of book-length projects. It combines the document features of Word with the outlining, research, character maps, and templating of many other popular writing tools all in one fairly inexpensive package. But the myriad features of the tool are also part of the reason writers get overwhelmed.
That’s why I always recommend that writers start by using Scrivener just like any other word processing software and add features one by one as you get more comfortable with the layout.
Part of the reason I’m so passionate about this tool, which I’ve been using for over a decade now, is because it can help break down the big picture of an 80,000 word novel into parts. That’s huge for writers, particularly if you’re neurodivergent.
Getting Started with Scrivener
The biggest difference between Scrivener and Word is that it allows you to break your story out into multiple different files either by scene or, if you prefer, by chapter. This is a huge advantage if, like me, you sometimes write out of chronology, because you can simply add a blank scene, write whatever’s on your mind, and then drag it into the right place in your story using the Binder.
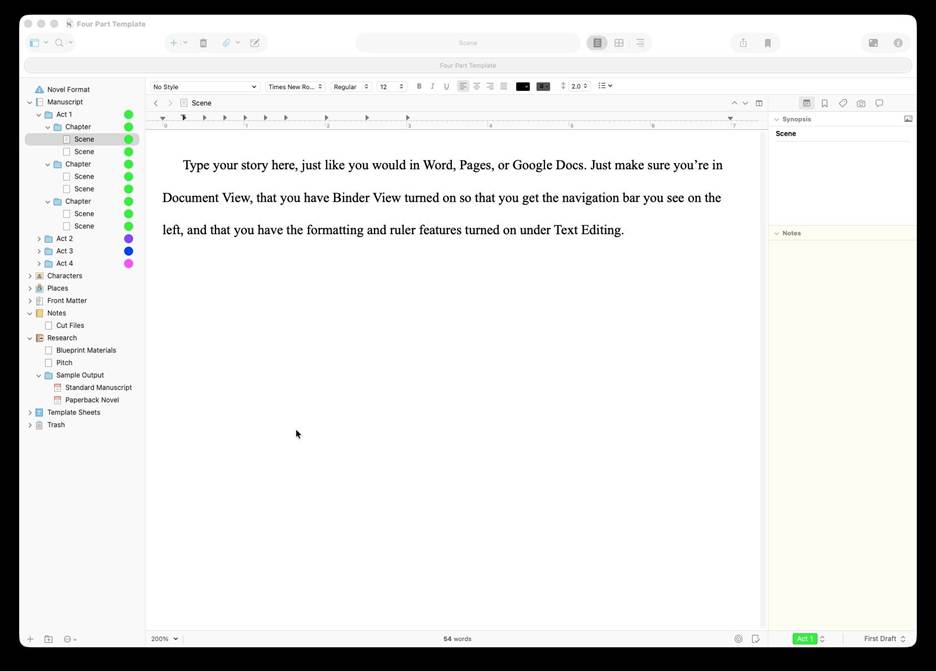
The Scrivener Binder makes your novel easy to navigate no matter how long it is!
If you’re only going to use one tool Scrivener offers, make it the Binder. It’s the navigational bar on the left side of the Scrivener window that lets you click through your entire book, drag and drop scenes to change the order if you need to, and more.
The Binder also helps you import your work-in-progress (WIP) to Scrivener from another type of software. Before you bring anything over, open a new Scrivener document and use the green plus sign to add a folder for each chapter. Then add a new text document under each chapter. Once you’ve got a text document for each chapter, you can just use copy and paste chapter by chapter to bring the story into Scrivener. Then you’re ready to get back to work on your manuscript.
Using Scrivener to Track Story Structure
Once you feel confident about using the Binder and have imported your story into their individual chapters, the next tool I’d suggest playing with is using labels to color-code your novel.
I love Book Structure for Disorganized Writers’ approach to creating a scene list right in Scrivener to help you keep track of where you are in your draft. But I have a tip you can add to that suggestion: color coding by act. And I’ve even made you a template you can use to implement this if you like: https://www.julieartz.com/scrivener
Whether you use a 3-act structure like Save the Cat, a 4-act structure like Story Engineering, or a 5-act structure like Shakespeare, you can use Scrivener to reinforce that structure visually. Once again, the Binder is the key to doing this, so make sure you have View | Binder selected from the View menu.
Note: The screen shots and step by step instructions in this post refer to the Mac OS version of Scrivener. If you’re on Windows, use the context-sensitive Help menu to find these same menu options in Scrivener for Windows. The same options exist, but are sometimes in a slightly different location in the menus.
Now go back to the View menu and select Binder under Use Label Colors In. If you’re in an existing Scrivener document and not the template I’ve created, that’s totally fine, but you might not notice a difference when you turn Use Label Colors in Binder on because you haven’t set up the labels yet (that’s what I did for you in the template, so go back up and grab it if you like!).
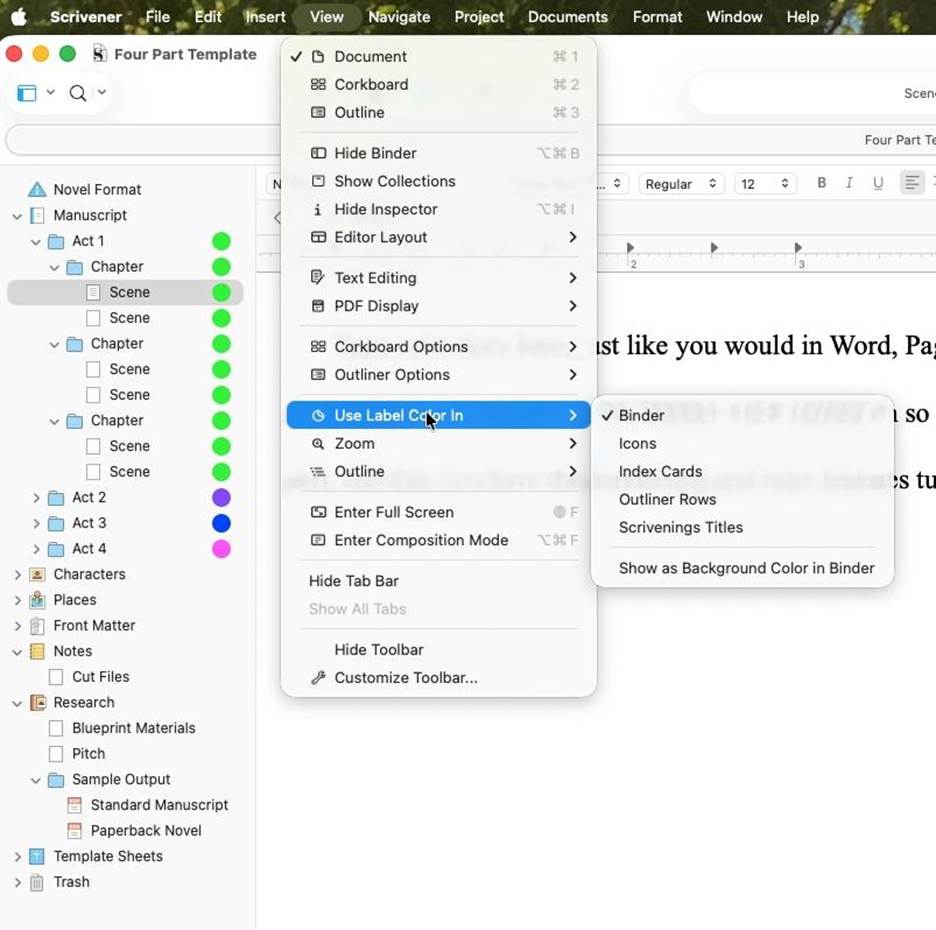
Turning Label Colors on in the Binder
Now all you have to do is find the text that says No Label in the bottom right corner of your screen. Click Edit to bring up a window where you can click the + to add whatever labels you want or the – to remove Act 4 if you only want to use 3-Act structure. Feel free to change the colors, add more labels for individual points of view or timelines, or whatever makes the most sense for your story.
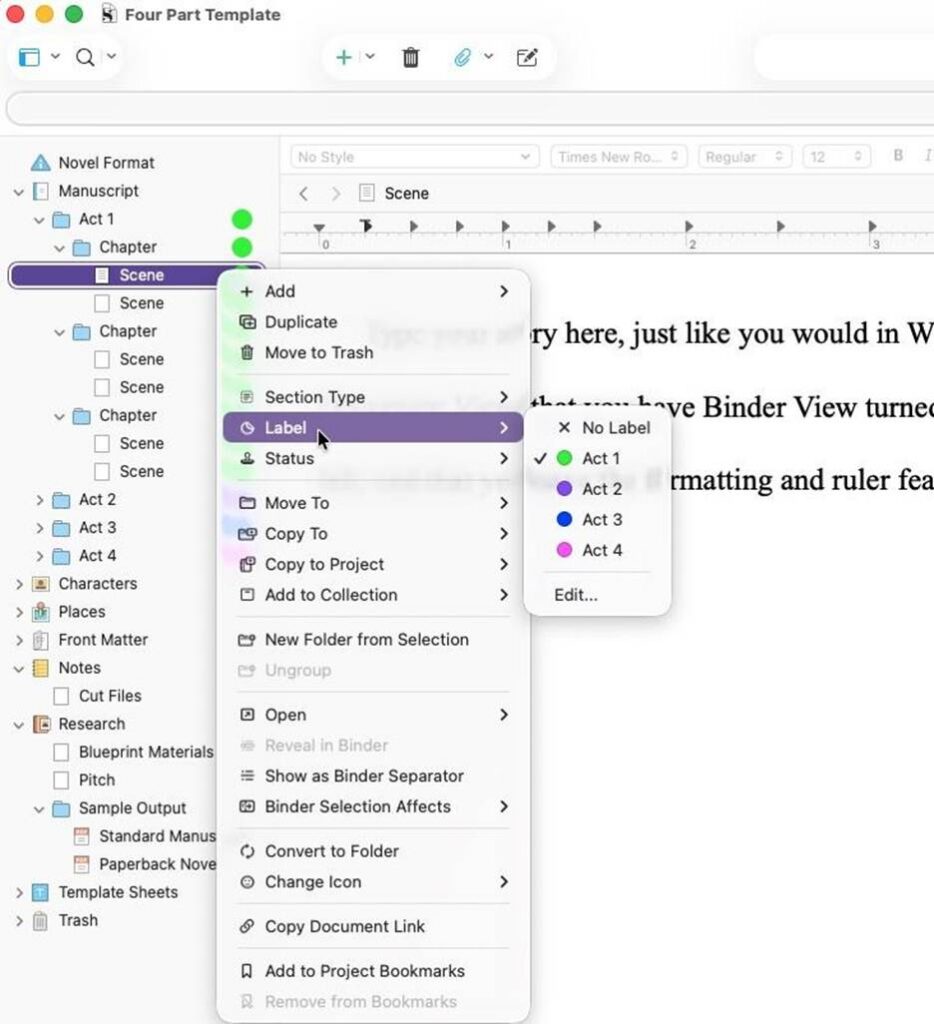
Adding Labels to your chapters in Scrivener
The final step is to assign the correct label to the individual chapters in your story. Just right-click on each chapter and go to Label, then choose the correct label. The colors should appear in the Binder like magic!
Additional Scrivener Resources
Hopefully this post helped you experiment with Scrivener without anxiety or overwhelm. If you’re hungry to add more of Scrivener’s tools to your writing toolkit, here are some additional resources for you:
- Scrivener and One Stop for Writers
- Using Project Targets to Motivate You Through the Murky Middle of Your Draft
- The Scrivener Blog is also full of tips when you’re ready for more!
- Standard Manuscript Format in Word and Scrivener
- Using Scrivener to Reinforce Manuscript Structure
If you’re using another product like Pages, Google Docs, or Word, which is, after all, the standard for the publishing industry, don’t worry. I’ll be back soon with a Part 2 to this post in just a few weeks.


